Showing posts with label Vegetables. Show all posts
Friday, 5 July 2013
Vegetables
Have you ever purchased bundles of ingredients at the farmers’ market only to arrive home and wonder what on earth to do with your bag of fiddlehead ferns, zucchini flowers, bamboo shoots, or cactus pads? Treat yourself to an in-depth education with Vegetables, acclaimed author and teacher James Peterson’s comprehensive guide to identifying, selecting, and preparing ninety-five vegetables—from amaranth to zucchini—along with information on dozens of additional varieties and cultivars.
Peterson’s classical French training and decades of teaching experience inform his impeccable presentation of every vegetable preparation technique and cooking method. You’ll begin by stemming, seeding, peeling, chopping, slicing, dicing, mincing, crushing, and pureeing, then explore less familiar but no-less-useful skills such as turning turnips, charring chile peppers, and Frenching French green beans. Once the prepping is complete, Peterson explains the intricacies of the many methods for cooking each vegetable, from the most straightforward boiling, braising, steaming, and stir-frying techniques, to the more elaborate and flavor intense grilling, glazing, roasting, sautéing, and deep-frying. The text is further enhanced with handsome full-color photography and useful extras, like time-saving workarounds, tips on seasonal purchasing, storage recommendations, and suggestions for kitchen tools you’ll really use.
Tuesday, 21 May 2013
Not Just A Weed
9 reasons why you should incorporate dandelions into your diet
#1. High in Calcium: Dandelion greens are loaded with calcium. Just one cup of chopped dandelion greens has 103 milligrams (10% of the recommended daily value) of calcium! That’s slightly more than kale!
#2. Rich in Iron: Next to fresh parsley, dandelion greens have a high iron content. One cup contains 1.7 milligrams of iron.
#3. Low Calories: Like all leafy greens, dandelions are low in calories. One cup of chopped dandelion greens has only 25 calories.
#4. Loaded With Antioxidants: Dandelion greens are high in vitamin A in the form of antioxidant carotenoid (beta-carotene) and vitamin C. Vitamin C also helps facilitate iron absorption.
#5. The Ultimate Detox & Cleansing Green: If your goal is detoxification and cleansing, dandelion greens should be the ones you use! They are said to help cleanse the liver and many detox recipes call for them.
#6. Lots Of Minerals: Dandelion greens are rich in minerals. Besides calcium and iron, they are a good source of copper (10% RDA), manganese (8% RDA), phosphorus (5% RDA), potassium (5% RDA) and magnesium (5% RDA).
#7. 14% Protein: Dandelion greens have more protein per serving than spinach. The greens themselves are 14% protein and contain all essential amino acids so it’s a complete protein. One chopped cup contains 1.5 grams of protein.
#8. Multivitamin Green: Besides vitamin A as beta-carotene (186% RDA) and vitamin C (21% RDA), each cup of chopped dandelion greens are also good sources of vitamins B1 (9% RDA), B2 (11% RDA) and B6 (11% RDA), vitamin E (13% RDA) and especially abundant in vitamin K (357% RDA).
#9. Health Benefits of Dandelion Greens: The nutrients in dandelion greens may help reduce the risk of cancer, multiple sclerosis, cataracts, age-related macular degeneration and stroke. Dandelion contains anti-inflammatory properties which may provide benefit to those with asthma and other inflammatory diseases.
How To Select And Store Dandelion Greens
While dandelion greens can be found at health food stores, co-ops and farmers markets, they are probably widely available during the spring and early summer months in your own backyard.
Select unblemished, dark green leaves or bunches when purchasing them in the store. When foraging, young greens that are harvested before the flower head appears will be less bitter.
Commercially cultivated dandelion greens may have whitish/green or red stems. The leaves are highly perishable. I store them in the fridge in a large plastic tub with a piece of paper towel to absorb excess moisture and condensation. They will keep for 2-4 days this way. If you store wet leaves in a produce bag, they will likely only last a couple days.
The dandelion greens that you find in the store are typically organic. If you forage for dandelion, be sure to harvest them from land that has not been treated with pesticides, herbicides or other contaminants. Avoid harvesting dandelion greens from urban or industrial waste lots as heavy metals (lead, mercury) and other pollutants in the soil might be absorbed into the plant.
How To Use Dandelion Greens In A Green SmoothieDandelions are bitter, so it makes sense to blend them with fruit to mask the flavor. Blend the dandelion greens with sweet, flavorful fruit like banana, strawberries, mango, citrus and pineapple. If you are trying dandelion for the first time, start with a small handful or 1 cup of chopped leaves.Here are some smoothie recipes that include your friendly neighbourhood weed courtesy of incredible smoothies.
Labels:
All Natural
,
diet
,
food
,
green
,
health
,
Herbivore
,
lifestyle
,
plants
,
recipes
,
Vegan
,
Vegetables
,
Vegetarian
,
vegetarian approved
,
weight loss
,
Wellness
Wednesday, 15 May 2013
Pallet Garden
This is a cool recycling and gardening project that is fun and easy to do. Take a pallet and turn it into a organized garden for growing herbs or flowers.
Supplies
•Heat treated
•2 large bags of potting soil
•16 six packs of annual flowers (one six pack per opening on the face of the pallet, and two six packs per opening on the top of the completed pallet garden),
•A small roll of landscape fabric
•A staple gun
•Staples
•Sand paper (to smooth rough edges)
Finding a Pallet
Try looking behind dumpsters at the supermarket, at hardware stores or online. Don’t just take the first pallet you find. You’re looking for one with all the boards in good condition, no nails sticking out, no rotting, etc. If you intend to put edibles in your pallet, be sure to find one that was heat treated as opposed to fumigated with pesticides. It will be labelled as HT.
Instructions
With the pallet laying flat, start stapling the cloth landscape fabric to it, to cover the back, both sides, and bottom of the pallet. Double the landscape fabric up, this will make it sturdier.
Pour a bunch of dirt on the pallet and start filling in the spaces with it. Start at the bottom and worked my way to the top. Don’t make it too tight, you want room for the flowers/herb plants.
When you get to the top, plant those plants first. This will help hold the other plants and dirt in the pallet. Then work your way down, planting your plants in each row. Make sure the dirt is firmly packed and added more where it was needed.
Leave your pallet garden flat for at least 2 weeks, longer if you can handle the wait! This helps everything mold together and not come a part when you stand it up. The planter will be very heavy when it is time to stand it up, so make sure you make it near where you plan to put it. Also, watering can be a little tricky. Put the hose on the top “shelf” and let the water trickle its way down to the bottom. It takes a little bit of time to do it this way, but probably works best.
Supplies•Heat treated
•2 large bags of potting soil
•16 six packs of annual flowers (one six pack per opening on the face of the pallet, and two six packs per opening on the top of the completed pallet garden),
•A small roll of landscape fabric
•A staple gun
•Staples
•Sand paper (to smooth rough edges)
Finding a Pallet
Try looking behind dumpsters at the supermarket, at hardware stores or online. Don’t just take the first pallet you find. You’re looking for one with all the boards in good condition, no nails sticking out, no rotting, etc. If you intend to put edibles in your pallet, be sure to find one that was heat treated as opposed to fumigated with pesticides. It will be labelled as HT.
Instructions
With the pallet laying flat, start stapling the cloth landscape fabric to it, to cover the back, both sides, and bottom of the pallet. Double the landscape fabric up, this will make it sturdier.
Pour a bunch of dirt on the pallet and start filling in the spaces with it. Start at the bottom and worked my way to the top. Don’t make it too tight, you want room for the flowers/herb plants.
When you get to the top, plant those plants first. This will help hold the other plants and dirt in the pallet. Then work your way down, planting your plants in each row. Make sure the dirt is firmly packed and added more where it was needed.
Leave your pallet garden flat for at least 2 weeks, longer if you can handle the wait! This helps everything mold together and not come a part when you stand it up. The planter will be very heavy when it is time to stand it up, so make sure you make it near where you plan to put it. Also, watering can be a little tricky. Put the hose on the top “shelf” and let the water trickle its way down to the bottom. It takes a little bit of time to do it this way, but probably works best.
Labels:
eco-friendly
,
garden
,
gardening
,
green
,
growing
,
happy
,
health
,
Herbivore
,
pallet
,
recycling
,
Vegetables
,
vegetarian approved
Tuesday, 14 May 2013
7 Tips for Growing Your Own Garden
Tip#1: Plan in advance
Plan your garden today to ensure summer success. Decide what you’d like to grow. How much space can you devote to the project? How much time are you willing to spend? Answering these questions will help you to determine your priorities.
For those with small spaces (or small ambitions), a container garden is an excellent choice. Containers can also supplement a traditional garden, providing a handy pot of herbs just outside the kitchen door, an experimental area for kids to grow their own produce, and allowing tender plants to be moved according to the season.
Others might consider building a raised bed to use for square-foot gardening. Square-foot gardening allows you to maximize food production in a minimum of space.
Tip#2: Start small
When planning your garden, it’s better to start too small than to start too large. In order to enjoy your garden, you must be able to control it. Don’t get too ambitious. It’s better to start small and to expand a little every year.
Tip#3: Choose productive plants
Some plants are more productive than others. If you want a rewarding, productive garden, do some research to find out what grows well in your area.
Tip #4: Share with others
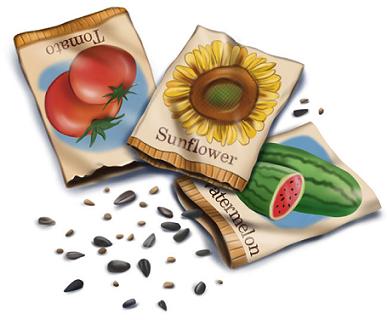
When you buy a packet of seeds, you generally receive more than you need. It’s fun (and frugal) to split the costs with others.
Also, share equipment with the neighbours. Careful borrowing and lending helps keep everybody’s costs down.
Tip #5: Buy quality tools
When you buy tools, it pays to purchase quality. Remember: thrift and frugality are about obtaining value for your dollar — not just paying the cheapest price.
Keep your eyes open at garage sales. Sometimes you can get great deals on quality stuff.
Tip #6: Read up on the subject
Your public library will have many books on the subject, some tailored to your location. There are also many excellent web sites that can help you get started. Here are some useful resources:
Books
•The Vegetable Gardener’s Bible by Edward C. Smith
•Square-Foot Gardening by Mel Bartholomew
•Crops in Pots by Bob Purnell
•The Bountiful Container by Rose Marie Nichols McGee and Maggie Stuckey
Websites
•You Grow Girl, a blog about gardening
•GardenWeb, “the internet’s garden and home community”
•Garden Guides: Guide to container gardening
•Journey to Forever: Building a square-foot garden
•Kitchen Gardeners International
Tip #7: Have fun!
Most importantly, have fun. Don’t make gardening into more work than it needs to be. Your garden doesn’t need to be perfect. It’s great if you’re able to achieve a substantial return on your investment, but it’s also okay if you lose a little money. (You don’t want to lose a lot of money, though)
Pick a favourite fruit or vegetable, plant a few seeds, and have fun watching them grow to maturity. Make it a family thing.
Tips courtsey of getrichslowly
Sunday, 12 May 2013
Cooler Corn
I came across a neat little trick for cooking lots of corn perfect and efficiently. This works great for a family get together, holidays or a camping trip. Take a (Coleman) cooler, wipe it clean, then fill it with the shucked ears. Next, pour two kettles-full of boiling water over the corn and close the lid.
Wait for about 30 minutes and you will have perfectly cooked corn. Apparently the corn will remain at the perfect level of doneness for a couple of hours.
Turns out, this trick for Cooler Corn is pretty well known among the outdoorsy set but for those of us who avoid tents as much as possible, it's perfect for large barbecues and way less of mess than grilling.
Labels:
BBQ
,
camping
,
coleman
,
cooler corn
,
corn
,
dinner parties
,
food
,
Herbivore
,
Vegan
,
Vegetables
,
Vegetarian
,
yummy
Tuesday, 7 May 2013
Top 5 Picks for a Healthy Lifestyle
Upgrade to a healthier lifestyle by incorporating these top 5 picks
into your diet. All recipes courtesy of The Earth Diet.
1. Lemon Water
For one drink, drink every morning!!!
Ingredients and Action:
1 lemon squeezed into a cup of water OR in a juicer: juice the lemon including rind and then add it to water.
BENEFITS:
2. Beet Juice
For one juice
Ingredients:1 small beet
3 carrots
3 celery stalks
1 small piece of ginger
1 red apple
1 lemon with rind
Action:
Put all ingredients in a juicer!
GET CREATIVE
+ ADD a clove of garlic
+ ADD a handful of kale
+ ADD a handful of spinach
BENEFITS:
3. Green Juice
For one juice
Ingredients:
1 small cucumber
1 green apple
3 celery stalks
1 lemon with rind
a handful of kale
a handful of spinach
a handful of parsley
Action:
Put all ingredients in the juicer and JUICE!
BENEFITS:
4. Coconut oil recipes
5. Kale recipes
into your diet. All recipes courtesy of The Earth Diet.
1. Lemon Water
For one drink, drink every morning!!!
Ingredients and Action:
1 lemon squeezed into a cup of water OR in a juicer: juice the lemon including rind and then add it to water.
BENEFITS:
- Relives digestion issues
- High in vitamin C
- Breaks down fatty deposits
- Boosts the Immune system
- Clears the skin
- Stimulates the body
- Bowels are aided in eliminating waste efficiently
- Relieves bloating
- Relieves indigestion
- Acts as a liver tonic and helps liver to produce bile
- Dissolves gallstones
- Relieves heartburn
- A natural antiseptic medicine
- Kills parasites
2. Beet Juice
For one juice
Ingredients:1 small beet3 carrots
3 celery stalks
1 small piece of ginger
1 red apple
1 lemon with rind
Action:
Put all ingredients in a juicer!
GET CREATIVE
+ ADD a clove of garlic
+ ADD a handful of kale
+ ADD a handful of spinach
BENEFITS:
- Purifying the blood
- Increasing the body`s production of glutathione, which helps the body detoxify cancer-causing poisons
- Lowering high blood pressure
- Cleansing the liver
- Lifting compacted waste from the bowel walls!
- Body building that helps the creation of red blood cells
- Accelerates weight loss
3. Green Juice
For one juice
Ingredients:
1 small cucumber
1 green apple
3 celery stalks
1 lemon with rind
a handful of kale
a handful of spinach
a handful of parsley
Action:
Put all ingredients in the juicer and JUICE!
BENEFITS:
- High in anti-oxidants
- High in vitamin A and C
- Good fibre
- Reduces Inflammatory
- Lowers cholesterol
- Boost immunity
- Reduces swelling under eyes
- Reduces black circles under eyes
- Super cleansing!
- Energy boosting!
- Cleansing for the skin
4. Coconut oil recipes
5. Kale recipes
Labels:
beet
,
Benefits
,
coconut
,
delicious
,
diet
,
green
,
health
,
healthy start
,
Herbivore
,
juice
,
kale
,
lemon water
,
lifestyle
,
mornings
,
recipes
,
Vegan
,
Vegetables
,
Vegetarian
,
weight loss
,
Wellness
Monday, 6 May 2013
Make Food Fun
It’s time to make food fun and enjoyable for kids and yourself. Fruits and veggies are colorful but it’s all in how you arrange them that create the interest to get people, particularly kids, to actually enjoy them. Here are some great inspirational pictures to get you enthused to make healthy food fun!
Labels:
alternatives
,
appitizers
,
breakfast
,
colorful
,
delicious
,
food
,
fruit
,
Fun
,
health
,
Herbivore
,
inspiration
,
kids
,
lifestyle
,
Vegetables
,
Vegetarian
,
weight loss
,
Wellness
,
yummy
Friday, 3 May 2013
Sweet Potato Breakfast Omelet
So I found this breakfast recipe for my Ovo-Vegetarians out there. It was originally made with meat but I decided that it didn’t need it. It makes 2 sweet potato crust breakfast omelets.
Omelet mixture:
8 whisked eggs
1.5 tbs salt1 finely chopped sautéed onion
1 finely chopped sautéed red pepper
2 cloves of minced sautéed garlic
2 cups of lightly steamed broccoli
½ cup of sundried tomatoes
1.Lightly greases 2 pies dishes. Thinly slice 1 large (or 2 small) sweet potatoes and arrange around the bottom of the pie dishes.
2.Sprinkle sweet potatoes with sea salt and pepper.
3.Pour the omelet mixture over top.
4.Bake at 150 for about 40 minutes.
Labels:
breakfast
,
delicious
,
eggs
,
happy
,
healthy start
,
Herbivore
,
omelet
,
sweet potato
,
Vegetables
,
Vegetarian
,
vegetarian approved
,
Wellness
,
yummy
Wednesday, 1 May 2013
What Type of Vegetarian Are You?
So you want to be a vegetarian? There are a few different categories of vegetarian diet that you can choose to fit your lifestyle and beliefs.
Semi Vegetarian: eggs and dairy are accepted. Red meat, poultry and fish are occasional.
Ovo-Lacto-Vegetarian: eggs and dairy are accepted.
Ovo-Vegetarian: eggs are accepted.
Lacto-Vegetarian: dairy is accepted.
Vegan: A person who does not eat or use animal products.
Macrobiotic: fish is occasional. No red meat, poultry, eggs or dairy.
Pescatarians: eggs, dairy and fish are accepted.
Fruititarian: eat fruit, nuts and
Rawism: consisting of uncooked, unprocessed, and often organic or wild foods.
Labels:
chart
,
diet
,
happy
,
health
,
Herbivore
,
lifestyle
,
terminology
,
Vegan
,
Vegetables
,
Vegetarian
,
vegetarian types
,
Wellness
Friday, 26 April 2013
VEG-iversary
I would just like to say that I have been a vegetarian for 3
year as of April 15, 2013. I started my journey in high school and have
continued right though college. It isn’t always easy but I can tell you this
much... veggies are way cheaper than meat.
Labels:
anniversary
,
health
,
Herbivore
,
lifestyle
,
Vegan
,
Vegetables
,
Vegetarian
Thursday, 25 April 2013
Carrots Give You Cancer
So you may have seen this post stating that
baby carrots are a danger to your health:
"DANGER
TO YOUR FAMILY!!
From the Department of Life Education:
Baby Carrots:
The following is information from a farmer who grows and packages carrots for IGA, METRO, LOBLAWS, etc.
The small cocktail (baby) carrots you buy in small plastic bags are made using the larger crooked or deformed carrots which are put through a machine which cuts and shapes them into cocktail carrots - most people probably know this already.
What you may not know and should know is the following:
Once the carrots are cut and shaped into cocktail carrots they are dipped in a solution of water and chlorine in order to preserve them (this is the same chlorine used in your pool).
Since they do not have their skin or natural protective covering, they give them a higher dose of chlorine.
You will notice that once you keep these carrots in your refrigerator for a few days, a white covering will form on the carrots. This is the chlorine which resurfaces. At what cost do we put our health at risk to have esthetically pleasing vegetables?
Chlorine is a very well-known carcinogen, which causes Cancer. I thought this was worth passing on. Pass it on to as many people as possible in hopes of informing them where these carrots come from and how they are processed.
I used to buy those baby carrots for vegetable dips. I know that I will never buy them again!!!!”
From the Department of Life Education:
Baby Carrots:
The following is information from a farmer who grows and packages carrots for IGA, METRO, LOBLAWS, etc.
The small cocktail (baby) carrots you buy in small plastic bags are made using the larger crooked or deformed carrots which are put through a machine which cuts and shapes them into cocktail carrots - most people probably know this already.
What you may not know and should know is the following:
Once the carrots are cut and shaped into cocktail carrots they are dipped in a solution of water and chlorine in order to preserve them (this is the same chlorine used in your pool).
Since they do not have their skin or natural protective covering, they give them a higher dose of chlorine.
You will notice that once you keep these carrots in your refrigerator for a few days, a white covering will form on the carrots. This is the chlorine which resurfaces. At what cost do we put our health at risk to have esthetically pleasing vegetables?
Chlorine is a very well-known carcinogen, which causes Cancer. I thought this was worth passing on. Pass it on to as many people as possible in hopes of informing them where these carrots come from and how they are processed.
I used to buy those baby carrots for vegetable dips. I know that I will never buy them again!!!!”
I’ve been trying to look into it and I found an article from wafflesatnoon.com which responds to this claim. From what I can tell they are no more dangerous to you than every other chemically treated vegetable in the grocery stores. They take deformed carrots and make them more attractive then rinse them in the same solutions that the rinse almost all market ready vegetables. It seems that the process is similar to the chlorination process they use to treat tap water (which is FDA approved.)
There are a
few alternatives if you are not happy with this process. You can buy organic or
you could buy local. Local vegetables don’t need to travel so they don’t treat
them so extensively (that’s if they even treat them at all.) I buy from a local
market down my street where they grow and sell their own vegetables. There is
something comforting about seeing the food you are about to eat growing all
around you. Also by buying local you are supporting your community.
Just
remember to always wash your fruits and vegetables before you eat them!
Labels:
Baby Carrots
,
Cancer
,
Carrots
,
Choices
,
Controversial
,
health
,
Herbivore
,
Vegan
,
Vegetables
,
Vegetarian
,
Wellness
Subscribe to:
Posts
(
Atom
)