Sunday 7 July 2013

The Truth About Red Dye


Anytime you see an ingredients list that includes carmine, cochineal extract or natural red 4, you can be sure that there's a little powdered bug therein.

The idea that any business would try to feed insects to a largely bug-averse populace may seem remarkable, but consider the alternatives: if it doesn't come from a bug, it may come from something worse.

Cochineal extract is extracted from the cochineal, specifically the female, a species of insect that belongs to the order entomologists refer to as the "true bugs." (Don't trust any account that calls this bug a beetle — it's not).

When Europeans descended on South America in the 1500s, they discovered that the Aztecs were producing vibrant, cochineal-dyed fabrics that retained their color for an incredibly long time. Soon, dried cochineal became a major trade good.

Today, cochineals are harvested mainly in Peru and the Canary Islands on plantations of prickly pear cacti, the bugs' preferred host. There, the insects are sun-dried, crushed, and dunked in an acidic alcohol solution to produce carminic acid, the pigment that eventually becomes carmine or cochineal extract, depending on processing. About 70,000 insects are needed to produce a pound of dye.

Until 2009, cochineal was one of many dyes that fell under the umbrella term "natural color" on ingredients lists. But because cochineal provokes severe allergic reactions in some people, the Food and Drug Administration requires carmine and cochineal extract to be explicitly identified in ingredients lists.

Aside from its role as an allergen, cochineal has no known health risks, although those who keep kosher or choose not to eat animal products will want to keep their distance. In addition to food, cochineal is used as a dye in cosmetics products, including lipstick, and at least one person has reported a severe allergic reaction to a cochineal dye used in a pill coating.

Cochineal may be made from bugs, but other synthetic red dyes such as Red No. 2 and Red No. 40, which carry far greater health risks, are derived from either coal or petroleum byproducts. Click here for a list of products to avoid that use Red No. 40.

 
Courtesy of livescience

Friday 5 July 2013

Vegetables


Have you ever purchased bundles of ingredients at the farmers’ market only to arrive home and wonder what on earth to do with your bag of fiddlehead ferns, zucchini flowers, bamboo shoots, or cactus pads? Treat yourself to an in-depth education with Vegetables, acclaimed author and teacher James Peterson’s comprehensive guide to identifying, selecting, and preparing ninety-five vegetables—from amaranth to zucchini—along with information on dozens of additional varieties and cultivars.

Peterson’s classical French training and decades of teaching experience inform his impeccable presentation of every vegetable preparation technique and cooking method. You’ll begin by stemming, seeding, peeling, chopping, slicing, dicing, mincing, crushing, and pureeing, then explore less familiar but no-less-useful skills such as turning turnips, charring chile peppers, and Frenching French green beans. Once the prepping is complete, Peterson explains the intricacies of the many methods for cooking each vegetable, from the most straightforward boiling, braising, steaming, and stir-frying techniques, to the more elaborate and flavor intense grilling, glazing, roasting, sautéing, and deep-frying. The text is further enhanced with handsome full-color photography and useful extras, like time-saving workarounds, tips on seasonal purchasing, storage recommendations, and suggestions for kitchen tools you’ll really use.

Wednesday 3 July 2013

Strawberry Rhubarb Crisp

Freshly picked strawberries and rhubarb cooked to sweet perfection and topped with vanilla ice cream.

Ingredients:
1 cup rolled oats
1 cup all-purpose flour
1/2 cup brown sugar
2 tsp of cinnamon
1/2 cup butter, melted
2 cups chopped strawberries
2 cups chopped rhubarb
1 cup cold water
1/2 cup white sugar
1 tbsp cornstarch


Directions:
1.Preheat oven to 350 degrees F (175 degrees C).
2.Mix oats, flour, brown sugar, cinnamon, and butter together in a bowl; press mixture into the bottom of a 9-inch pie pan. Top with strawberries and rhubarb.
3.Stir water, white sugar, and cornstarch together in a saucepan. Bring to simmer, constantly whisking, until mixture bubbles and thickens; pour over fruit layer.
4.Bake in the preheated oven until bubbling, about 1 hour.


Note: The original recipe did not call for cinnamon but I added it and I liked the results :)

enjoy my little herbivores.

Tuesday 2 July 2013

My Forecast... Cloudy, with a Chance of Meatballs

I know it's been a while since my last post, but I wanted to start things off again with a trailer to the sequel to my favourite movie! I am just so excited that I had to share it with the world.

 
Coming to theatres September 27. The wait is on!

Monday 17 June 2013

The Truth about Aspartame

Aspartame is used in over 6,000 products worldwide, and is consumed habitually by millions of people every day. When aspartame is digested by the human body, it is broken down into aspartic acid, phenylalanine and methanol. The phenylalanine is synthetically modified to carry a methyl group which provides the sweetness. Methanol causes all types of biochemical health problems in humans with many symptoms unrecognized as associated to aspartame use. This is because aspartame builds up in the frontal lobe of the brain, and is cumulative over time. We cannot metabolize or break it down enough to limit its damage.

Peroxisomes are small structures within each cell that work to detoxify methanol. Humans do not have enough of these structures to convert formaldehyde to the less harmful, formic acid. Formaldehyde is a deadly neurotoxin. Human tissues are damaged and symptoms occur that include; vision problems, dizziness, headaches, nausea, gastrointestinal disturbances, vertigo, weakness and memory lapses to name just a few.
 
Artificial sweeteners trigger pleasure centers in the brain, even though less pleasure is experienced by ingesting them. The reason for this is, while artificial sweeteners give immediate pleasure, they do not actually satisfy the brain because they deliver no caloric value, leaving the user wanting even more. Because there is little actual satisfaction associated with the use of artificial sweeteners, weight gain also occurs. Those who habitually use aspartame are known to gain more weight over time than those who use real sugar.

Aspartame is referred to as an “excitotoxin”, because it actually excites the neural cells to death. The chemicals and amino acids in aspartame have been known to get through the blood brain barrier and damage neurotransmitters, while decreasing serotonin levels, leading to depression and other mental disorders.
 
Other chronic conditions such as; brain tumors, multiple sclerosis, epilepsy, fibromyalgia, and diabetes are worsened by the use of aspartame. Some scientists and doctors suspect that aspartame may be responsible for the development of certain types of cancers, too.

Many symptoms of aspartame poisoning go undetected for years because they are confused with another diagnosis. If you’re curious as to whether you’re experiencing any symptoms or reactions to aspartame, just stop using it for a few weeks and see what changes occur.
 
courtesy of fitlife

Saturday 15 June 2013

5 Alternatives to Your Everyday Antiperspirant


While some people are concerned about common deodorant chemicals like parabens, formaldehyde and triclosan, most concerns focus on aluminum, the ingredient in antiperspirant that blocks pores and fights wetness. Aluminum is rumored to be linked to breast cancer and other diseases, but the National Cancer Institute says this research is inconclusive. In addition to these potential health risks, aluminum mining is also destructive and polluting. If you’re thinking twice putting such ingredients on your body, check out these deodorant alternatives.

1. Natural deodorants
Deodorant stones are large, smooth crystals of potassium aluminum sulfate that must be wetted and applied like a regular deodorant stick. The difference between potassium alum and aluminum chlorohydrate is that potassium alum is a much larger molecule that's not thought to be absorbable through skin. However, if you want to completely eliminate aluminum from your armpits, there are many natural deodorants on the market. Burt's Bees, JASON, Trader Joe's, Kiss My Face and several other companies all offer an all natural alternative.


2. Baking soda and cornstarch
Using baking soda as a deodorant is a simple way to combat body odor without subjecting your pits to a variety of chemicals. Mix an eighth of a teaspoon of baking soda with a little bit of water — don't dissolve it — and rub it under your arms. You can also create a baking soda and cornstarch mix to fight odor and help prevent wetness. Simply mix one part baking soda with six parts cornstarch and dust a little on your underarms.


3. Lemon juice
The citric acid in lemon juice can kill odor-causing bacteria, and there are people who swear by the lemon deodorizing method. Swipe the armpits with a sliced lemon on a daily basis. Just be sure not to apply lemon juice to recently shaven armpits — ouch!


4. Rubbing alcohol
Rubbing alcohol is another inexpensive and easy deodorant that kills odor-causing bacteria. Simply fill a spray bottle with alcohol and spritz your underarms with it. You can even add a few drops of your favorite essential oil to give it a scent — witch hazel absorbs oil and is mildly astringent, and tea tree oil can help relieve body odor.


5. Homemade deodorant
Making your own deodorant is a simple process that allows you to customize your deodorant to your needs and preferences. The Web abounds with DIY deodorant recipes, but here are two from popular bloggers.


Tammy Luna's deodorant
1/4 cup baking soda
1/4 cup arrow root powder or corn starch
5 tablespoons coconut oil


Combine baking soda and arrow root powder in a bowl and mix with a fork. Start with about 4 tablespoons of coconut oil and add it to the baking soda mixture, working it into a paste. You can store the deodorant in a small, air-tight container or put it into an empty deodorant stick dispenser.

Amy Karol's deodorant
3 tablespoons shea butter
3 tablespoons baking soda
2 tablespoons corn starch
2 tablespoons cocoa butter
2 vitamin E oil gel caps (squeeze out the oil)
Essential oil


Melt all the ingredients except the oils and stir. Then mix in the oils, pour the mixture into a container, and place the container in the fridge to set. This recipe filled a 1/4 pint jar.

courtesy of mother nature network

Thursday 13 June 2013

Simply Delicious White Bread

My recipe for the bread machine that makes simple, delicious white bread.

1 cup of warm (not boiling) water
3 cups of flour
2 tbsp of vegetable oil
3 tbsp of honey
2 tsp of sugar
1 tsp of salt
1.5 tsp of bread machine yeast


1. Place water, honey, oil, bread flour, sugar, salt, and yeast into pan of bread machine.
2. Bake on White Bread setting. Cool on wire racks before slicing.


(NOTE: while the bread is still warm take a slice and spread honey on it. This is my favourite part about making bread because it brings out the sweetness of the bread and it is absolutely delicious.) 

enjoy my little herbivores.

Sunday 9 June 2013

Chocolate Covered Kiwi Pops

recipe courtesy of oh desserts
 
Kiwi – peel and cut into 1 inch thick rounds, with a popsicle stick in each round. Freeze on a tray in the freezer.

Chop 1 cup dark chocolate and 1/2 cup Coconut oil – melt over a double boiler. Cool down to room temp.

Dip each Kiwi-pop into the chocolate mixture (it will immediately turn crispy) and place on a tray to refreeze

enjoy my little herbivores.

Thursday 6 June 2013

Fruity Organic Salad

 
Today I made a pledge to eat healthier than normal and made myself a delicious salad for dinner. It had a pleasant but not overwhelming sweetness that I just had to share.
 
To make this particularly tasty salad I used:
•A mixture of organic fresh greens
•Organic blueberries
•Freshly picked strawberries from my garden
 
The dressing was made using a Dark Chocolate Oil with a splash of white wine vinegar. The ratio between oil and vinegar is determined by personal taste.
 
enjoy my little herbivores


Monday 3 June 2013

Tofu "Egg" Salad Recipe

With a tablespoon of mustard to give it a yellowish hue, this tofu egg salad recipe really looks and tastes like egg salad. Serve on bread with lettuce for a vegan "egg" salad sandwich.

Prep Time: 10 minutes

Ingredients:

  • 1 block firm tofu, drained
  • 1/3 cup mayonnaise (use Vegenaise for a vegan version)
  • 1/3 cup sweet relish
  • 1/2 tsp lemon juice
  • 1/2 stalk celery, diced
  • 1/2 tsp garlic powder
  • 1/2 tsp onion powder
  • 1 tbsp mustard
  • dash paprika for garnish (optional)

Preparation:

In a medium-sized bowl, mash the tofu with a fork. Add remaining ingredients and stir together until well combined. Sprinkle with paprika for garnish, if desired. Serve on bread with lettuce for an "egg" salad sandwich, or spread on crackers for a casual hors d'ouerves

enjoy my little herbivores

courtesy of vegetarian.about

Thursday 30 May 2013

Vegetarian Spider


The eight-legged vegetarian, called Bagheera kiplingi, lives in Central America, and is now considered a rarity among the world's 40,000 or so spider species, most of which are strictly predators, feeding on insects and other animals. B. kiplingi is about the size of a person's pinky nail.

"This is really the first spider known to specifically 'hunt' plants; it is also the first known to go after plants as a primary food source," said study researcher Christopher Meehan of Villanova University in Pennsylvania.

 read more at livescience.com

Tuesday 28 May 2013

Myths vs. Facts


Roughly 20 million Americans are vegetarians, from partial vegetarians who limit the amount of animal flesh they eat, to vegans, who eat only plant foods—no meat, poultry, fish, dairy products, or eggs.

A vegetarian diet may take a little extra planning—especially at first—but it is easy to learn how to ensure your diet is healthy.
As with any diet, you have to make the right choices. Here are some myths surrounding vegetarian diets.

Myth: Vegetarian diets are always healthy.

Fact: People who follow a vegetarian diet are relatively healthier than those who don't. Vegetarians tend to have a lower incidence of obesity and fewer chronic health problems, including some cancers, heart disease, high blood pressure, and diabetes.

It's difficult to determine, however, whether the vegetarian diet or the overall lifestyle deserves the credit for better health. Vegetarians tend to exercise regularly and not smoke or drink.
Moreover, if you make the wrong food choices, a vegetarian diet can be downright unhealthy. A steady diet of ice cream sundaes and french fries, which technically are vegetarian, won't lead to good health. Teenage girls who are vegetarians often are deficient in iron and may get too little calcium as well. Teenage girls and women who are vegans may be deficient in vitamin B12.

Your best bet: Daily, eat a variety of plant-based foods, including: fortified whole grains, fruits, dark green leafy vegetables, beans and legumes, tofu, and fortified soy milk or low-fat dairy products.

Myth: You shouldn't follow a vegetarian diet if you are pregnant or breastfeeding.

Fact: You can meet the nutrient needs of pregnancy and breastfeeding through a plant-based diet if you choose wisely. Your health care provider may advise you to take an iron, B12, or folic acid supplement.

Myth: It isn't safe for infants, children, and teens to be vegetarians.

Fact: Infants, children, and teens can meet their nutritional needs through vegetarian diets, although
meeting those needs is more difficult than with a standard diet.

To ensure a child receives all the necessary nutrients, a parent must plan and follow the child's diet carefully. In addition, a health care provider or a dietitian can provide additional assistance.

Myth: A vegetarian diet is always low in fat.

Fact: If your vegetarian diet contains dairy products, you can still get plenty of saturated fat from whole milk, cream, and cheese. If you're a vegan, you won't consume as much, if any, animal-derived saturated fat, but you can still overdo it on unsaturated vegetable fat, such as olive oil and canola oil. Although unsaturated fat tends to be heart healthy, it still contains as many calories per tablespoon as butter and can lead to weight gain if you consume too much.

Myth: Eating a vegetarian diet always reduces your risk for heart disease.

Fact: Although vegetarians tend to have a lower risk for heart disease than meat-eaters, simply following a vegetarian diet might not be enough.

Because of the genetic factors associated with heart disease, a person may be predisposed to high cholesterol or high blood pressure. These risk factors may require medication—no matter how heart-healthy the diet.

Courtesy of the University of Rochester Medical Center

Monday 27 May 2013

Little Dresses for Africa

So today, I discovered that a group of girls I know are doing their part to contribute to developing countries. They are sewing up a batch of sundresses for a charity that sends them to girls in Africa. Little Dresses for Africa are the non-profit, Christian organization, that delivers these sundresses to Africa. These sun dresses are made from gently used pillow cases which are easy and simple to make into a little dress.

WHY PILLOWCASES? The pillowcase pattern has been around since the pioneer days and is easy enough for even a novice seamstress. Pillowcases are available in so many colors and patterns. They already have the hem and sides in them and are often sitting unused on shelves in closets all across the country. With just a little help they can be turned into bright little sundresses, perfectly suited for the African climate. Pillowcase dresses are only a suggestion. Any simple pattern is great to use.

To date over 1.5 million dresses have been donated.

“We’re not just sending dresses, we’re sending HOPE!”

I took some pictures in hopes of inspiring others!


 Get the pattern here!

Saturday 25 May 2013

The Vegan Survival Guide

 
Here is a Vegan survival guide I received from Love-Vegan. She has a lot of vegan recipes, articles and advice. Go check her out for more information!

1.Read ingredient labels – You will find that you buy foods time after time. You will obviously know what’s what in these foods.  When you buy new foods however, ALWAYS check! You often get an allergy warning too. That won’t always tell you, if it contains meat, but will usually tell you about dairy and eggs. Once you have checked for the obvious things – like meat, fish, dairy and eggs don’t forget – honey and gelatin  I usually stay away from “Natural Colourings / Flavourings  Natural can mean anything including cochineal which is crushed bugs (YUK). But the “Natural Flavorings” could be meat of fish. Don’t risk it!

2.If in doubt ask! – I recently asked at my local supermarket about an in-store baked loaf of bread which had what looked like butter and garlic on the top. I asked if it had egg or dairy in it. They checked all the ingredients and I found out that not only could I eat this loaf but the entire in store baked breads were dairy and egg free! Bonus!  When you go to a restaurant, ask if the “fries” are fried in the same oil as fish or chicken are fried. However, if you are not bothered about this then don’t worry!

3.Show compassion! – I believe we shouldn’t preach to people about their food. Unfortunately Vegans are given a bad rap because we can be quite militant in our beliefs. I believe there is a time and a place for this and out for a nice relaxed meal with your friends, family or colleagues is probably not it.  People may find it difficult to respect your diet but make sure you rise above it and show compassion for them! Kill them with compassion!

 
4.Eating Out – When I’m planning to eat out, I usually research the restaurant well so that I know what I can and can’t eat. It’s also a good idea to call the restaurant and let them know before you go that you are Vegan and confirm what that means. A few days before is great and that way the chef will have chance to order any extra ingredients in. However, I’ve called an hour earlier to pre-warn the restaurant and they were still able to accommodate. If you are off to a movie or show you may find yourself hungry afterwards so it means popping into the local restaurant. This can be a total worry for us wonderful vegans. I’ve taken a great tip from the great Kris Carr of Crazy Sexy Cancer. Order a huge salad and then take either the rice, cous cous or lentils from this dish or the sweet potato fries, pasta or broccoli from that dish, burger without the meat even!? There is always something you will be able to find – just think outside the box

5.Bring your own! – If you’ve been invited to a BBQ or a party, make a dish to bring. Prepare yourself if it’s incredibly vegan, your friends might not eat it but hey more for you!


6.Answer questions – This is a fine line of being informative without preaching. People are often interested in how you can take on a Vegan diet. The cries of “I could never do that!” forever ring in my ears.  From my experience I have found it is easier to avoid confrontation by just saying I am doing this for health reasons. People can understand a diet change for health (Many have done more difficult diets than a vegan one!) My advice is start people slowly you can then move on to other parts of being vegan. My favourite question is “Where do you get your protein!?” Ever heard the expression – STRONG LIKE BULL! Bulls are Vegan you know!

7.Substitute, substitute, substitute –                                                                                                                                                                                   
Butter – Olive Oil or Dairy free Margarine
Eggs in baking – banana or applesauce, baking powder or you can get egg re-placer 
Chicken or Beef Flavor – Onion, Garlic or vegetable stock cubes   

Milk – Soya milk, Almond milk, Oat milk, Rice milk, hemp milk and even Hazelnut milk – There are loads just try and pick a favourite
Cheese – There are many different types of non dairy cheeses. Nut cheeses and even soya. Some of the Soya ones melt too – great for vegan pizzas.  

Meat and Fish – You can buy so many different fake meats and fish.

8.Snacks – Take snacks everywhere you go! 


 A Bottle of filtered water (essential)
 A Herbal teabag
 A piece of fruit
 Some nuts
 Chopped veggies (carrots, celery) with hummus.

 
9.Vitamin B12 – I  usually have fortified rice milk with B12 in or marmite but, you can also have supplements.

10.Eat your greens! – Leafy greens are natures intended food they have loads of protein, iron, vitamins, minerals and chlorophyll. All essential for a healthy diet!

11.Soya – It can cause health problems.  Its great in moderation just don’t rely on it as your main food. I have it 2 or 3 times a week but you should decide how much you want it. Err on the side of caution.

12.Ignore negative criticism – Always do that, which you know to be right. You will get negative criticism here and there but, you will become a great judge of what you can and cannot say in the right situation. Quietly lead by example.

13.Find like minded vegans – You can Twitter other Vegans; join forums or even a local Vegan society. You can find out about it on the Internet.

14.Don’t make it more difficult than it is! – Take it 1 meal at a time! This is an evolving process. However, don’t kid yourself that it’s the most difficult thing that you will ever do because it’s not. The more you tell yourself how difficult it is, the more difficult it will be! This is what stops people from giving up smoking and giving up meat for just 1 meal!

15.Plan, Plan, Plan! – Again another obvious one but so worthwhile! In the beginning its really essential. Fail to plan – Plan to fail! – Winston Churchill

16.Try Everything! – As long as its Vegan! If you don’t you may miss out on a delicious morsel! If you hate it, don’t eat it again.

17.Whoops! – If you have an accidental mistake, don’t beat yourself up! Just pay attention, learn from it and move on! Its unlikely you’ll be caught out by meat but you may have the odd occasion of dairy or egg.

18.Research – Research everything! The Internet is an amazing tool and if you are equipped with lots of knowledge you will find your journey a lot easier!

Thursday 23 May 2013

Bring a Bagel for Lunch


Bagels are a hard food to bring for lunch because the contents get so messy and squished. I came across this picture and it's amazing because it's recycling and super convenient. Take a CD storage container, clean it and TAD-DA you have a perfect size bagel holder. No more squished bagels and messy eating!

Wednesday 22 May 2013

Inside out Caramel Apples

A great snack and easy to do!
 

INGREDIENTS:
3 large Granny Smith apples
1 large lemon
2 cups brown sugar
1/2 cup heavy cream
2 tbs butter
2 tbs light corn syrup
1 tsp vanilla extract
1/4 cup chopped pecans (optional)

ACTION:
Cut your apples in half and use a melon baller to scoop out the insides, leaving the walls intact at about 1/2 inch thickness.(NOTE: the more you apple you remove, the more caramel you will end up with)

Squeeze the juice from the lemon onto the apples and allow to set. This will keep them from turning brown right away.

In a sauce pan over high heat, add the brown sugar, butter, heavy cream and corn syrup. Stir until the brown sugar has dissolved. Allow to boil, stirring occasionally, until it reaches 230 degrees, about 7-10 minutes. Remove from heat and add the vanilla, stir continually until it stops bubbling. Allow to cool for about 10-15 minutes.

Using a paper towel, wipe your apples down, removing the lemon juice as much as possible. If the inside of your apple is too wet, the caramel wont stick.

Pour the caramel into the hollowed out apples until just below the top.


Sprinkle with pecans. (if desired)

Chill in the refrigerator until the caramel has set, about 20 minutes.


Cut into serving slices.

Enjoy my little herbivores.


caramel recipe courtesy of  domesticfits
 

Tuesday 21 May 2013

Not Just A Weed


9 reasons why you should incorporate dandelions into your diet

#1. High in Calcium: Dandelion greens are loaded with calcium. Just one cup of chopped dandelion greens has 103 milligrams (10% of the recommended daily value) of calcium! That’s slightly more than kale!

#2. Rich in Iron: Next to fresh parsley, dandelion greens have a high iron content. One cup contains 1.7 milligrams of iron.

#3. Low Calories: Like all leafy greens, dandelions are low in calories. One cup of chopped dandelion greens has only 25 calories.

#4. Loaded With Antioxidants: Dandelion greens are high in vitamin A in the form of antioxidant carotenoid (beta-carotene) and vitamin C. Vitamin C also helps facilitate iron absorption.

#5. The Ultimate Detox & Cleansing Green: If your goal is detoxification and cleansing, dandelion greens should be the ones you use! They are said to help cleanse the liver and many detox recipes call for them.

#6. Lots Of Minerals: Dandelion greens are rich in minerals. Besides calcium and iron, they are a good source of copper (10% RDA), manganese (8% RDA), phosphorus (5% RDA), potassium (5% RDA) and magnesium (5% RDA).

#7. 14% Protein: Dandelion greens have more protein per serving than spinach. The greens themselves are 14% protein and contain all essential amino acids so it’s a complete protein. One chopped cup contains 1.5 grams of protein.

#8. Multivitamin Green: Besides vitamin A as beta-carotene (186% RDA) and vitamin C (21% RDA), each cup of chopped dandelion greens are also good sources of vitamins B1 (9% RDA), B2 (11% RDA) and B6 (11% RDA), vitamin E (13% RDA) and especially abundant in vitamin K (357% RDA).

#9. Health Benefits of Dandelion Greens: The nutrients in dandelion greens may help reduce the risk of cancer, multiple sclerosis, cataracts, age-related macular degeneration and stroke. Dandelion contains anti-inflammatory properties which may provide benefit to those with asthma and other inflammatory diseases.

How To Select And Store Dandelion Greens
While dandelion greens can be found at health food stores, co-ops and farmers markets, they are probably widely available during the spring and early summer months in your own backyard.

Select unblemished, dark green leaves or bunches when purchasing them in the store. When foraging, young greens that are harvested before the flower head appears will be less bitter.

Commercially cultivated dandelion greens may have whitish/green or red stems. The leaves are highly perishable. I store them in the fridge in a large plastic tub with a piece of paper towel to absorb excess moisture and condensation. They will keep for 2-4 days this way. If you store wet leaves in a produce bag, they will likely only last a couple days.

The dandelion greens that you find in the store are typically organic. If you forage for dandelion, be sure to harvest them from land that has not been treated with pesticides, herbicides or other contaminants. Avoid harvesting dandelion greens from urban or industrial waste lots as heavy metals (lead, mercury) and other pollutants in the soil might be absorbed into the plant.

How To Use Dandelion Greens In A Green SmoothieDandelions are bitter, so it makes sense to blend them with fruit to mask the flavor. Blend the dandelion greens with sweet, flavorful fruit like banana, strawberries, mango, citrus and pineapple. If you are trying dandelion for the first time, start with a small handful or 1 cup of chopped leaves.

Here are some smoothie recipes that include your friendly neighbourhood weed courtesy of incredible smoothies.


Monday 20 May 2013

The Lives We Save

“It’s not about the lives you can’t save, it’s about the one’s you can”  -Katrina Haining

This is quote that I stand by in my day to day life. I worked at a Pet Store for 5 years of my life and many people would leave animals outside our building hoping we could find them a home. In reality, we weren’t allowed to take strays and sell them. It was against company policy. When we found these poor animals (cats mostly) we would have to take them to the shelter where they may or may not find a home. This was not okay with me. I could not take a cat and leave it without knowing what would happen to it. Instead, I would take the cat home with me until I could find it a new, permanent, home. Luckily, I knew a lot of people that lived on acreages that were always happy to have a new furry friend.


Here is my cute and eccentric best friend, Razzle. I rescued her almost 4 years ago from the parking lot I described earlier. She was probably 5 weeks old and was lucky we found her. She was in the loading dock of another building in the same shopping center. It took 4 of us to catch her and she was terrified. I knew that our store couldn’t keep her, and they told me that she was now my responsibility.  I called my mom and asked to keep her. She said no. I was torn with what to do because I just knew that she was meant to be my cat. So I brought her home anyways. I put her in the basement and waited for the wrath of my parents. They came home and I took them to meet her. I was just hoping they would fall for her charm the way I did. My dad’s exact words were “she has certain enduring qualities.” It was that moment that she became my cat. 4 years later we have now moved out into our own apartment and she remains to be a constant joy in my life.
 
We shouldn’t lose sleep over trying to save every animal. Instead, we should think about how we can try to make a difference to the life of one.
This is Maple she is the puppy I helped my parents adopt from the SPCA a few months ago.
 
Whose life have you had a positive impact on? Comment here or post pictures on Herbivore's  facebook page!


Friday 17 May 2013

Fruit Popsicle

With summer at our door its time to enjoy the heat and cool off with a nice treat. What better snack than a healthy popsicle made entirely of fruit!

Ingredients:
3 cups watermelon puree (seedless if possible)
1/2 cup fresh blueberries
1/2 cup chopped fresh strawberries
1 kiwi, peeled and sliced
1 peach or nectarine, diced small
handful fresh cherries, pitted and chopped


Cut the watermelon into chunks and then puree it in a blender until smooth. Set aside.

Set out about 1 dozen popsicle molds (amount needed will vary depending on size of molds). Fill each one with the chopped fresh fruit. Then pour in the watermelon puree until each mold is full to the top. Place a popsicle stick into each one. Place into your freezer and freeze for about 6 to 8 hours.

When ready to serve, run the popsicle molds under warm water for a few seconds and then pull each one out.

Crisp Cucumber Salsa

 
Note: 1/4 cup is only 16 calories!
 
In one bowl combine:
 2 cups finely chopped seeded peeled cucumber
 1/2 cup finely chopped seeded tomato
 1/4 cup chopped red onion
 2 Tbsp minced fresh parsley
 1 jalapeno pepper, seeded and chopped
 4-1/2 tsp minced fresh cilantro
 1 garlic clove, minced or pressed
 
In another bowl combine: 
 1/4 c reduced-fat sour cream
 1-1/2 tsp lemon juice
 1-1/2 tsp lime juice
 1/4 tsp ground cumin
 1/4 tsp seasoned salt

Pour the liquid mix over the cucumber mixture and toss gently to coat. Serve immediately with chips.
 
Enjoy my little herbivores.

Thursday 16 May 2013

A Bear, a Lion and a Tiger

Here is a truly inspirational story of three unlikely best friends that reside at Noah’s Ark, a wild-animal rescue center in Georgia. Together they make an nontraditional “BLT.”
 
In a small pen, Baloo (an American black bear), Leo (the lion) and Shere Kahn (a Bengal tiger) cuddle, play ball, chase each other around, eat cookies daily and seem to have forged a friendship for life.

The three predators were rescued as cubs 12 years ago from drug dealers who’d abused and neglected them. 


“All of them had issues,” Hedgecoth said. “Leo, the lion, had a big raw spot on his nose. Baloo, the bear, had an ingrown harness where his owners hadn’t lengthened it as he grew, so it actually grew into the skin and it had to be surgically removed. … They have recovered more than 100 percent.”
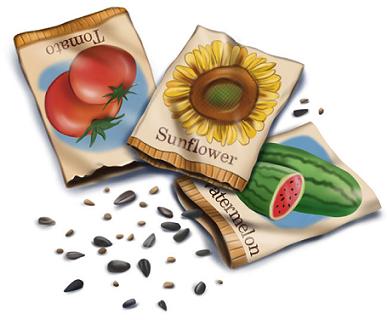
 
Trainers tried separating them at first but they acted out. They waited for fights to break out between them but there was nothing.

There are 3 main reasons as to why there is no aggression between them:
1.They have all been neutered.
2.They have never had to compete for food.
3.They have never had to compete for females.

 
Check out this video to see more about their story and to watch them interact together. This is definitely a very special and unique situation that is extraordinary to see.
 

Wednesday 15 May 2013

Pallet Garden

This is a cool recycling and gardening project that is fun and easy to do. Take a pallet and turn it into a organized garden for growing herbs or flowers.

Supplies

•Heat treated
•2 large bags of potting soil
•16 six packs of annual flowers (one six pack per opening on the face of the pallet, and two six packs per opening on the top of the completed pallet garden),
•A small roll of landscape fabric
•A staple gun
•Staples
•Sand paper (to smooth rough edges)


Finding a Pallet
Try looking behind dumpsters at the supermarket, at hardware stores or online. Don’t just take the first pallet you find. You’re looking for one with all the boards in good condition, no nails sticking out, no rotting, etc. If you intend to put edibles in your pallet, be sure to find one that was heat treated as opposed to fumigated with pesticides. It will be labelled as HT.


Instructions
With the pallet laying flat, start stapling the cloth landscape fabric to it, to cover the back, both sides, and bottom of the pallet. Double the landscape fabric up, this will make it sturdier.

Pour a bunch of dirt on the pallet and start filling in the spaces with it. Start at the bottom and worked my way to the top. Don’t make it too tight, you want room for the flowers/herb plants.

When you get to the top, plant those plants first. This will help hold the other plants and dirt in the pallet. Then work your way down, planting your plants in each row. Make sure the dirt is firmly packed and added more where it was needed.

Leave your pallet garden flat for at least 2 weeks, longer if you can handle the wait! This helps everything mold together and not come a part when you stand it up. The planter will be very heavy when it is time to stand it up, so make sure you make it near where you plan to put it. Also, watering can be a little tricky. Put the hose on the top “shelf” and let the water trickle its way down to the bottom. It takes a little bit of time to do it this way, but probably works best.


Tuesday 14 May 2013

7 Tips for Growing Your Own Garden


Tip#1: Plan in advance
Plan your garden today to ensure summer success. Decide what you’d like to grow. How much space can you devote to the project? How much time are you willing to spend? Answering these questions will help you to determine your priorities.

For those with small spaces (or small ambitions), a container garden is an excellent choice. Containers can also supplement a traditional garden, providing a handy pot of herbs just outside the kitchen door, an experimental area for kids to grow their own produce, and allowing tender plants to be moved according to the season.


Others might consider building a raised bed to use for square-foot gardening. Square-foot gardening allows you to maximize food production in a minimum of space.

Tip#2: Start small
When planning your garden, it’s better to start too small than to start too large. In order to enjoy your garden, you must be able to control it. Don’t get too ambitious. It’s better to start small and to expand a little every year.

Tip#3: Choose productive plants
Some plants are more productive than others. If you want a rewarding, productive garden, do some research to find out what grows well in your area.

Tip #4: Share with others
When you buy a packet of seeds, you generally receive more than you need. It’s fun (and frugal) to split the costs with others.

Also, share equipment with the neighbours. Careful borrowing and lending helps keep everybody’s costs down.

Tip #5: Buy quality tools
When you buy tools, it pays to purchase quality. Remember: thrift and frugality are about obtaining value for your dollar — not just paying the cheapest price.

Keep your eyes open at garage sales. Sometimes you can get great deals on quality stuff.

Tip #6: Read up on the subject
Your public library will have many books on the subject, some tailored to your location. There are also many excellent web sites that can help you get started. Here are some useful resources:

Books
The Vegetable Gardener’s Bible by Edward C. Smith
Square-Foot Gardening by Mel Bartholomew     
Crops in Pots by Bob Purnell
The Bountiful Container by Rose Marie Nichols McGee and Maggie Stuckey

Websites
You Grow Girl, a blog about gardening
GardenWeb, “the internet’s garden and home community”
•Garden Guides: Guide to container gardening
•Journey to Forever: Building a square-foot garden
Kitchen Gardeners International


Tip #7: Have fun!
Most importantly, have fun. Don’t make gardening into more work than it needs to be. Your garden doesn’t need to be perfect. It’s great if you’re able to achieve a substantial return on your investment, but it’s also okay if you lose a little money. (You don’t want to lose a lot of money, though)
Pick a favourite fruit or vegetable, plant a few seeds, and have fun watching them grow to maturity. Make it a family thing.

Tips courtsey of getrichslowly

Sunday 12 May 2013

Cooler Corn


I came across a neat little trick for cooking lots of corn perfect and efficiently. This works great for a family get together, holidays or a camping trip.

Take a (Coleman) cooler, wipe it clean, then fill it with the shucked ears. Next, pour two kettles-full of boiling water over the corn and close the lid.
Wait for about 30 minutes and you will have perfectly cooked corn. Apparently the corn will remain at the perfect level of doneness for a couple of hours.

Turns out, this trick for Cooler Corn is pretty well known among the outdoorsy set but for those of us who avoid tents as much as possible, it's perfect for large barbecues and way less of mess than grilling.

Saturday 11 May 2013

ECO-Friendly Mattress Cleaner

Here is an easy, eco-friendly and inexpensive method of cleaning your mattress.

CLEAN YOUR MATTRESS:
Pour about 1 cup of baking soda into a jar & add 4 drops of lavender essential oil. Put on the lid & shake the jar. Using a kitchen strainer, sprinkle the baking soda mixture all over the mattress & let it sit for an hour or more. Thoroughly vacuum the mattress.

Say goodbye to dust mites, & other nasty things. The baking soda helps draw up any moisture & deep dirtiness. It deodorizes & leaves the mattress smelling fresh & clean.

Lavender Benefits:
BODY: Gentle, versatile & balancing. A natural antibiotic.
MIND: Lavender has anti-depressant qualities and can be used for anxiety, irritability and melancholia. Brings a feeling of calm and can help insomnia.
Avoid in first trimester of pregnancy and with low blood pressure.

Friday 10 May 2013

B-raw-nies

Here is a recipe for frosted brownies that are gluten-free, raw, and soy-free. You can feel good about munching on these raw brownies, made with nuts and dates... and don't pass on making the frosting, it's what makes these brownies especially delicious.

INGREDIENTS:
Base:
1 cup raw almonds (see note)
1/4 cup raw cashews
1/2 cup raw walnuts
1 3/4 cups (packed) pitted medjool dates (see note)
1/4 cup dried organic pitted cherries (OR more dates, ie can use 2 cups dates in whole - omit almond extract if not using cherries)
1/3 cup raw cocoa powder (or regular cocoa if you prefer)
1 vanilla bean (see note)
1/4 tsp sea salt
1/2 tsp almond extract (optional)


Frosting:
1/2 cup coconut butter (not coconut oil)
Artisana coconut butter
1/4 cup raw agave nectar (or can use pure maple syrup if raw not essential)
2 tbsp raw cocoa powder (or regular if you prefer)
pinch sea salt


ACTION:
In a food processor, first add almonds and cashews and process until very fine (the almonds are the hardest, and need to be worked until crumbly). Let them process for a minute or two until quite fine. Then add walnuts, dates and cherries and pulse/process until mixture is quite crumbly, but not yet coming together. Then, add cocoa powder, salt, and almond extract, and pulse through. With a sharp tip knife, slice the vanilla bean down the outer side to open up the bean. Using a blunt (butter) knife, scrape out all the tiny seeds from the bean on both sides, and add them to the processor (or add vanilla extract). Process again, along with the almond extract if using. Process until the mixture comes together. The mixture should be sticky and hold together when pressed with your fingers. You don’t want to over mix (to prevent the nuts from releasing their oils, see note), but the mixture does need to hold and be sticky. If it’s not doing so, add a few drops of water, as your dates might be dry. Once you have a good, sticky mixture that will hold together, remove it from the processor and press into a brownie pan (8” x 8”) lined with parchment paper. Use a small piece of the parchment to help press and flatten the mixture evenly into the pan. Press it firmly to ensure the mixture holds. For the frosting, in a mini-food processor, first combine the coconut butter and agave nectar until smooth. Then add the cocoa powder and salt, and pulse through again until just combined. Do not over process or the frosting will begin to separate with the heat of the churning and become oily. (If you don’t have a mini-processor, you can follow the same steps stirring by hand in a bowl). Smooth frosting over base, and refrigerate for an hour or more until set. Cut into squares and serve! You can also freeze the squares after cutting, and enjoy them out of the freezer!


NOTE:
  • A combination of ¾ cup almonds and ½ cup cashews also works well.
  • You can substitute 1 – 1 ½ tsp of pure vanilla extract for the vanilla bean seeds.
  • If your dates are on the dry side, you can add 1-2 tbsp of water to the mixture to help assist the pureeing and the mixture easily coming together.
  • If you process the mixture too long, the heat generated by the food processor will bring the oils out of the nuts. If this happens, the brownies won’t be ruined necessarily, but they will have an oily appearance and be oily to the touch. So, process minimally to begin, rather than over processing the nuts at the outset.

Recipe from the book Let Them Eat Vegan.